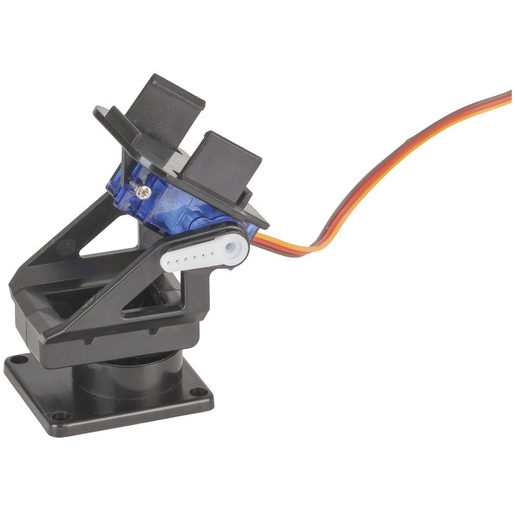
I needed a small, cheap and simple servo operated 2-axis gimbal for my Quadcopter/Drone build. Barely large enough to mount a GoPro but suitable for many FPV cameras this solution is achievable for around AUD10.00
Where to Buy?
I bought the Jaycar version of this because there’s a store only a few hundred metres from my home and AUD4.95 isn’t a huge expense. (http://www.jaycar.com.au/pan-and-tilt-action-camera-bracket-mount-for-9g-servos/p/XC4618)
Banggood also sell the same unit for even less. AUD2.75 (USD1.99) – http://www.banggood.com/2-Axis-Servo-Gimbal-FPV-Camera-Platform-Tilt-Support-9g-12g-Servo-p-973523.html
What you Get? (Buy more stuff)
At these sorts of prices don’t expect fancy packaging, instructions or servos! So you’ll need to get two “9g” Micro-Servos. I got mine from HobbyKing for a mere AUD3.46 each. (http://www.hobbyking.com/hobbyking/store/uh_viewItem.asp?idProduct=23996) but if you’re ordering from Banggood you may as well save the shipping as they’re only AUD3.25 each delivered! http://www.banggood.com/TowerPro-SG90-Mini-Gear-Micro-Servo-9g-For-RC-Airplane-Helicopter-p-1009914.html
My investment in the 2-axis Gimbal was under AUD12, and if I’d have bought everything online would have been comfortably under AUD10!
The gimbals come as 4 plastic parts and a bog of screws, the servos will include the servo, an few “horns” and various mounting screws. Obviously there’s a knack to putting these together!
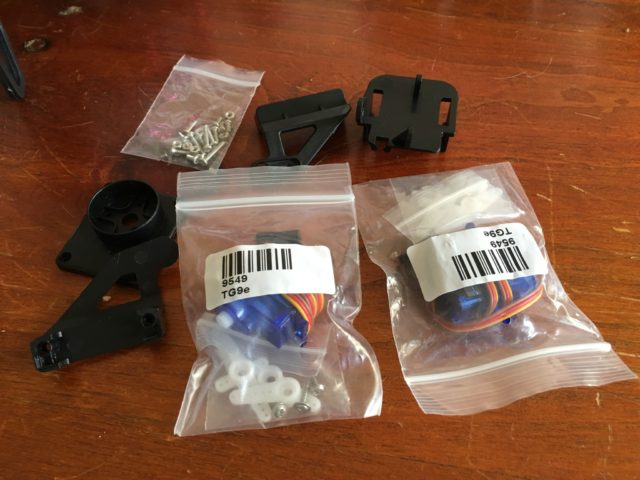
At this price point you’re on your own when it comes to instructions and fancy packaging!
Assembling the 2-axis Gimbal
This isn’t difficult, just follow the simple steps below.
Mount the Servos
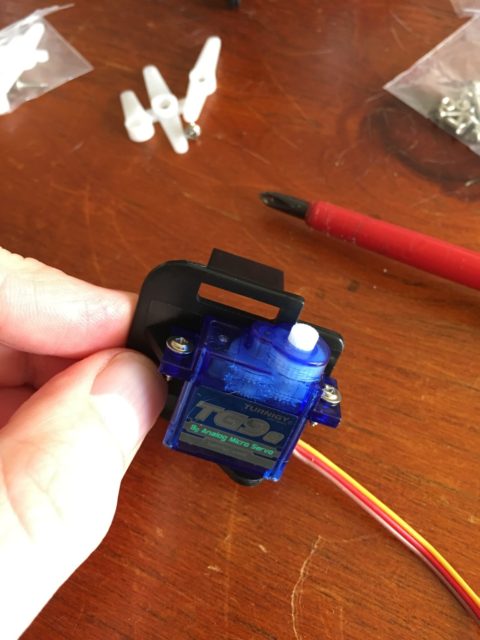
Using two of the screws included with the kit securely mount the servos as shown.
The mounting tabs for this servo lock in place between the two halves. Use the included screws to join the halves – holding the servo in place.
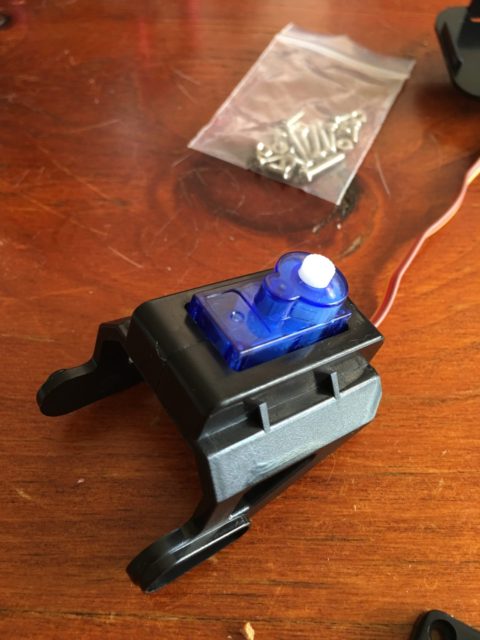
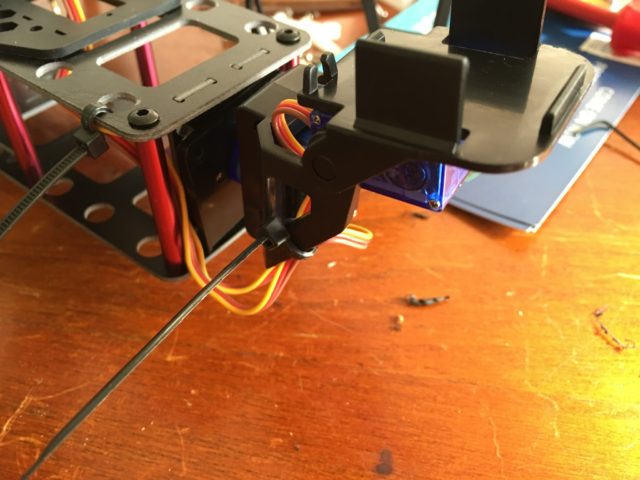
Join the Pan and Tilt portions
This next step can feel like you need 3 hands, the camera mount platform mounts to the mid-section of the gimbal using the servo horn and one part of the assembly.
![IMG_4124[1]](http://excesstext.com/wp-content/uploads/2016/07/IMG_41241-640x480.jpg)
![IMG_4126[1]](http://excesstext.com/wp-content/uploads/2016/07/IMG_41261-480x640.jpg)
I found I had to trim the servo horn down to fit into the moulded part of the gimbal frame. The servo horn gets attached to the servo with the appropriate screw (included with servo).
Mounting the Base
This is where things go weird. The included mounting base appears to be designed to sit flat and be screwed to whatever you are mounting the gimbal to. However the round section is too tall to fit with the servo design. I suspect when the gimbal was designed a very specific servo was used – one that it’s common at our “almost free” price point.
![IMG_4128[1]](http://excesstext.com/wp-content/uploads/2016/07/IMG_41281-480x640.jpg)
![IMG_4127[1]](http://excesstext.com/wp-content/uploads/2016/07/IMG_41271-480x640.jpg)
For my build/drone this wasn’t an issue as the camera location on my drone frame meant reversing the gimbal base was actually “better”. However if you need to mount on a flat surface first trim down the servo horns to fit. Work out how much of the round collar needs to be trimmed away to allow the servo to engage with the horn.
The screws that secure the base plate to the horn should be screwed through the flat side of the base. There’s tiny countersunk screws included that will leave a flash surface on the flat side of the mount. They’re just long enough to fully engage in the horn.
Once you’ve got everything joined together you can mount it to you frame.
It’s very obvious the camera mounting plate has been designed with a specific unit in mind. I’ll almost certainly be removing the excess plastics and adding a simple GoPro mount.