The 2-Bucket Wash method is the most commonly recommended process for keeping your car clean. In this post I describe a minimalist approach to the 2-Bucket Wash Kit which will keep your car looking great on a tight budget. Continue reading The Minimalist 2-Bucket Wash Kit
Category: Detailing
Detailer Tip: Stopping Creaky Door Noises
One of the most common complaints with late model cars are door noises like creaks, squeaks or rattle noise from the doors. It can sound like a “crack” when crossing driveways and often can often get worse after the car is detailed.
Once the usual suspects like loose and broken trim are ruled out dealerships and workshops are often at a loss to explain the noise let alone remedy it.
What causes Creaky Door Noises?
The noise we hear is actually caused by part of the door seals design and material that’s meant to reduce noise! When you look at your door seals you’ll see they are made up of a number of parts. The main cause of the noise is the outermost “flap” that serves to reduce wind noise and also act as an initial barrier to dust and water.
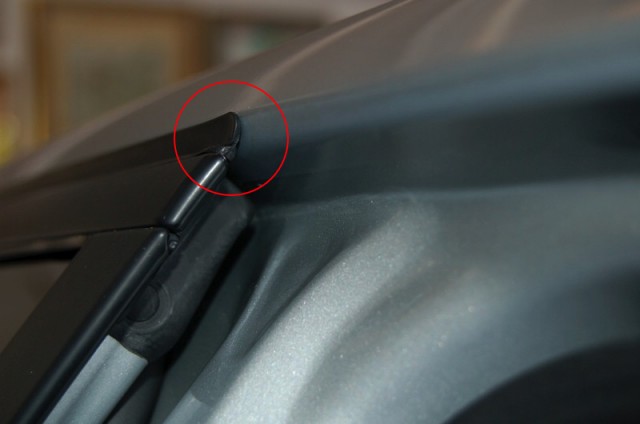
On the inside the seal has a “flocked” or “felted” finish which is the cause of the noise.
Why? Well I’ve heard a lot of reasons and the most common is that as manufacturers strive to reduce costs of cars the quality of finishes like these suffer, this results in the fibres not being as long, plush or effective as intended.
Instead the fibres stick and release with movement of the door. This appears to worsen after waxes or sealants are applied to the paintwork in the area of these seals.
How do we address it?
There’s three possible solutions:
- Replace the seals: BMW for example has a number of replacement seals available that are used by dealerships to address the noise when raised as warranty complaints. Anecdotally the replacement seals have a plusher finish and resolve the issue.
I doubt this is cost effective for owners and most manufacturers will not have a revised part. - Lubricate the seals: As detailers this is the easiest approach requiring a small addition to our “tool kit” and requiring only a few minutes of our time. While this is not a permanent solution it can be incorporated into the regular wash process and remains very cost effective.
- Add lubrication to the body: This fix is now used by BMW and other manufacturers to provide a long-term fix. It involves laying a low-friction self-adhesive strip around the door openings where the flocking would normally contact the bodywork.
Lubricating Flocked Door Seals
There are a number of products of varying prices that can used for the job. My preference is for a simple Paraffin Wax stick which does the job, costs next to nothing and doesn’t have any risk of marking clothing or hands if touched.
Really when deciding on a product you want two things – a “dry” finish and a product that doesn’t mark or discolour clothing when brushed against.
Gummi Pflege, Teflon Sprays, Dri-Lube, Silicone Sprays all will work – however they only last 3-4 weeks.
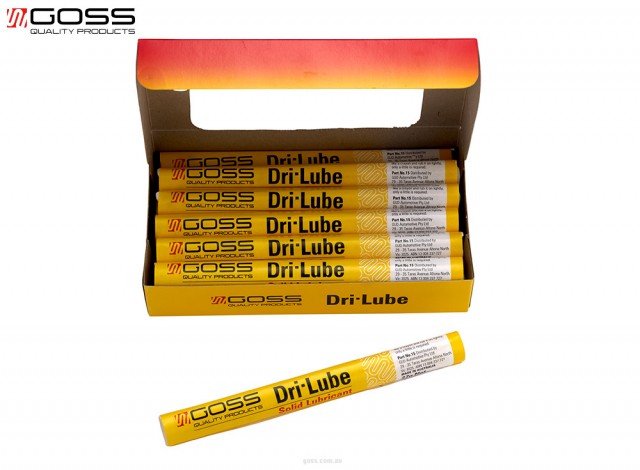
My goto is Goss Dri-Lube, a stick of paraffin wax that is applied much like a crayon
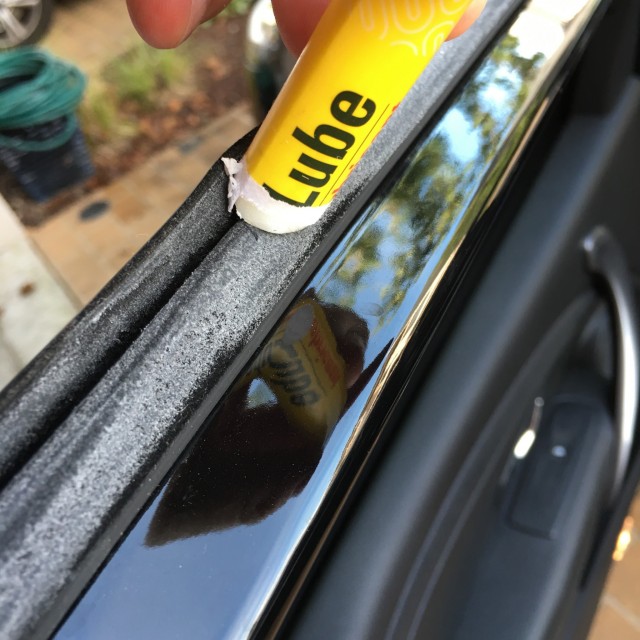
As you can see in the photo I’m applying a generous layer over all the flocked parts of the seal. In warm weather the whiteness “melts” away quickly eating the fibre and stopping the creaking door noises!
But what if that doesn’t work?
While in most cases lubricating the flocked door seals will resolve the door noises there are cases where it doesn’t work.
Bentley has this particular issue on some models which is resolved by adding lubrication under the seals where they attach/fit to the door.
For this a Silicone Grease is used, and simply smeared between the rubber of the seal and the door. To do this I’d use a spray pack of silicone grease and the tip to get between the seal and body and then massage around the door.
What about a permanent solution?
The most cost effective solution thats likely to last long term is to apply a Teflon tape around the door openings where the flocking contacts the body.
The recommended tape is 3M “5430” Squeak Reduction Tape which is best described as specialised and has a specialised price tag of AUD187 for a 33m roll of 25.4mm width.
Premium Wheel Cleaners
You know the feeling you get when there’s a task you should do but really don’t want to do because there’s something more unpleasant in the way?
I’ve got that feeling these days thanks to a spare (cheap) set of wheels lined up in the garage.
The problem is they’re dirty, the kind of dirty that doesn’t come off with detergents or All Purpose Cleaners, the kind of dirty that comes off in your hand and not in the wash. The kind of dirty you hope your daughter will never be.
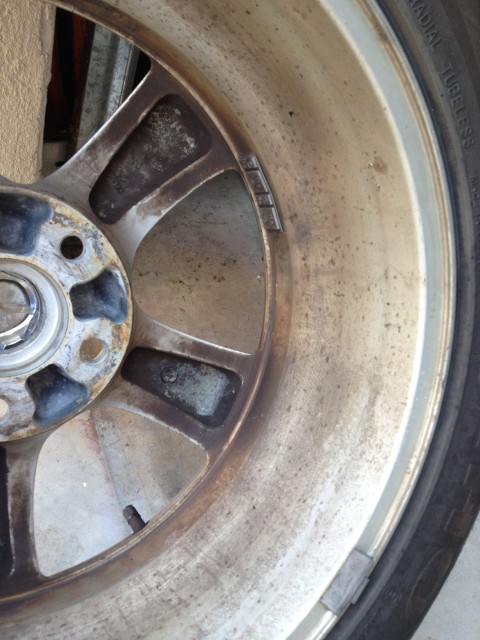
So what better opportunity to get some of the “off the shelf” wheel cleaners and have a go at comparing them. The best bit was these wheels need refinishing so any damage done wasn’t going to upset me.
The Test Subjects
I’ve seen on forums talk of IronX and similar – decontamination chemicals that turn purple as they work – and when I read that Bowdens Own “Wheely Clean” did the same I was keen to try it. My other contender, from the UK was Autoglyms “Custom Wheel Cleaner”.
Both claim to not damage wheels or paintwork, both claim to strip away contamination, both claim to make the job easy.
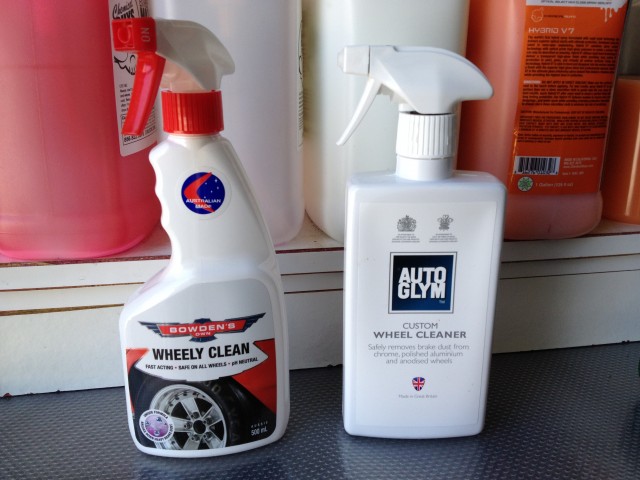
The two products were bought from local resellers at/around their respective RRPs. They’re both just under AUD20 so neither is a “budget buy”.
The Test
The easy bit – tape up a wheel into three sections, one for each brand and one “before” section. Use each product according to instructions, compare before and after. The best result wins.
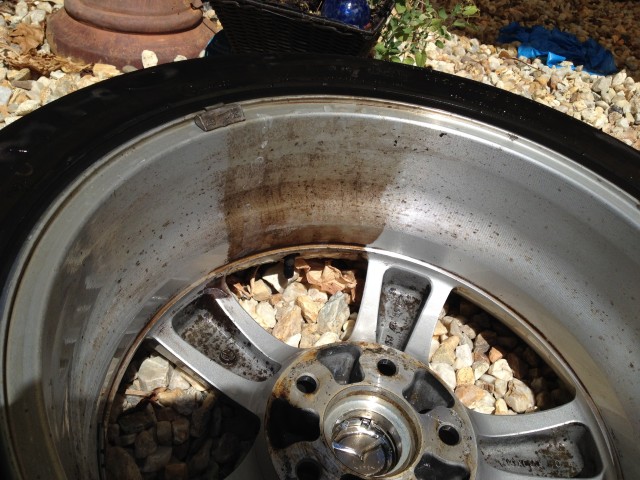
As the picture shows the Bowdens Own Wheely Clean has delivered a better result, neither product breaks down grease and tar effectively so a further cleaning process would be needed to deliver the best possible results.
I believe the two products are quite evenly matched, however the Bowdens Own product instructions specify more agitation and soak time than the Autoglym. Naturally this will contribute to a better outcome.
The Bowdens own product does turn purple, and while neither has the greatest scent the Bowdens really does get “on the nose”. If I was a betting person I’d be thinking Peroxide (as in hair bleach) is the key ingredient – maybe an experiment is in order.
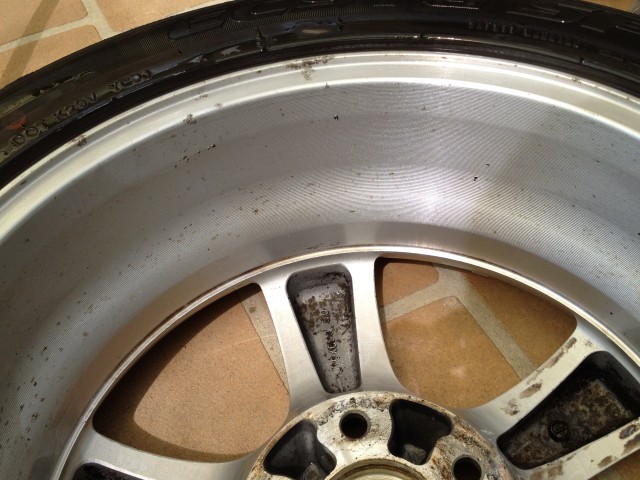
After the initial comparison I re-cleaned the entire wheel with Bowdens Own – again I doubt the results would be significantly different had I used the Autoglym – but the second clean was worth the effort.
Recommendation
I have no doubt that every home detailer needs to have a product like these in their kit. The speed of the result and the overall ease of use lift them head and shoulders above scrubbing with with old-school soap products.
The downside is cost, I’ve gone on to use these products in conjunction with my regular detailing and would say that 12 wheels is about the maximum you can expect to clean per bottle. I’d recommend using a wheel cleaner like these to break down heavy buildups of brake dust and and contamination, but for weekly washes I think you’ll find greater value in using a good set of cleaning tools and normal detergents.
For my money I’ll be sticking with Bowdens Own – their wheel cleaner product works and it’s a great opportunity to support an Australian business that is bringing good products to market.
